HeadMouse® Mounting Options
Mounting Brackets
There are different types of mounting brackets available. There are two universal types that are adjustable and mount to the back or front of the host device. These can be used with any device such as laptops, desktop displays, tablets and Speech Generating Devices (SGD). There are also custom brackets available that are designed for specific devices.
For Apple iPad, we currently have a variety of custom mounts available, and we are also developing more. Some of these mounts are designed to fit over the bare iPad enclosure and are held securely in place using magnets. Others are created specifically for third-party cases and use a combination of friction and a flexible clamp to keep the mount in place. In both cases, the HeadMouse Nano can be easily inserted into the mount and it is secured with snaps.
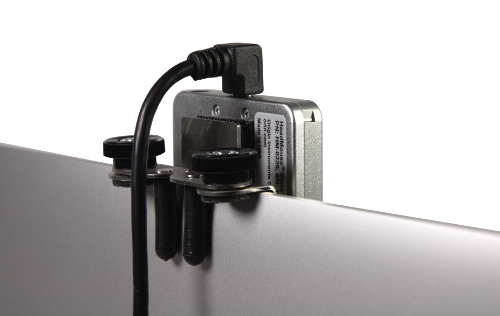
The universal padded brackets are held in place with two adjustable and rubber tipped legs, as shown in the images below.
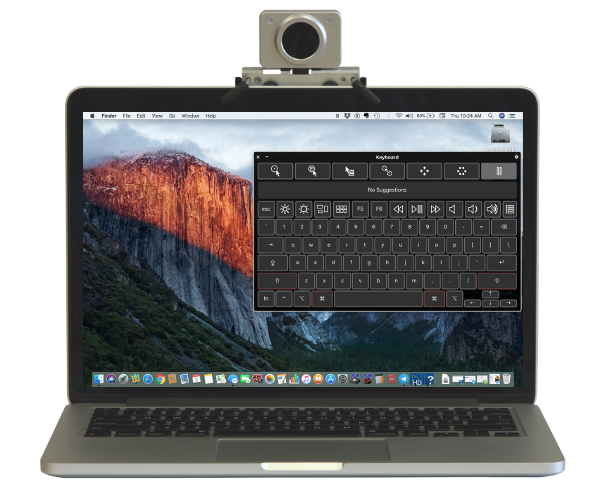
The HeadMouse rests on rubber pads and securely attaches to the bracket using Dual Lock. The rubber tipped legs and thumbscrew are clearly visible. To accomodate a variety of display thicknesses the bracket comes with a set of longer legs.
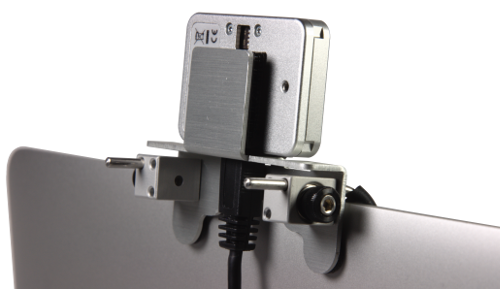
The front legs of the bracket can be rotated to accommodate thinner bezels and prevent obstruction of the display.
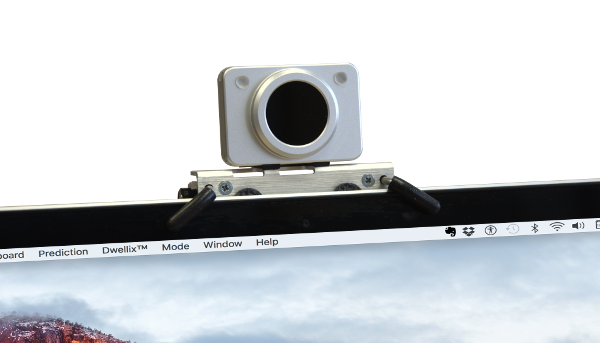
There is a second style of universal bracket that positiones the HeadMouse on the front of the display. It uses rotating arms with thumb nuts and rubber fingers to accomodate different display thicknesses. It has a padded front tab that slides over the front of the display. The arms are rotated against the back of the display and capture the display between the tab and rubber fingers. Squeeze the rubber fingers against the tab and tighten the thumb nuts. Squeeze enough to firmly hold the bracket in place, but not enough to damage your display. The HeadMouse attaches to the front of the tab using Dual Lock.
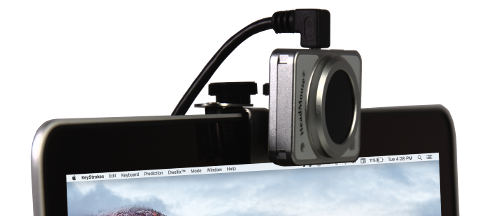
Notice the arms are rotated toward the center of the bracket in the photographs, but they can also be rotated out.
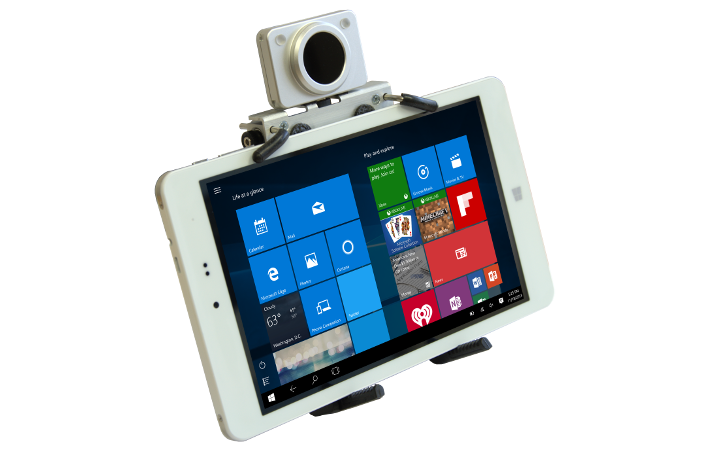
In addition to computers the universal brackets can also accomodate tablets.
Special 3D printed mounts are available
It's difficult to confidently claim whether a specific mount will fit a particular iPad model, especially if the iPad is in a case. This is because iPads have undergone subtle and noticeable changes in their shape and thickness over the years. However, we have observed that these changes have slowed down in recent times, and we believe that our 3D-printed mounts will fit many old and new iPad models, regardless of whether they are in a case or not.
The Unicorn Beetle case is a popular and well-made case, but it is not special in any way. We have noticed that the external dimensions of this case have not changed for the past few iPad models. As a result, if you have a Unicorn Beetle case for your iPad, the bracket provided below should fit or need only minor modifications. It is always easier to adjust an existing interface profile than to design a new one from scratch. However, we cannot guarantee that the model files will fit perfectly, and some dimensions or angles may need to be adjusted.
To help you create your own interface profiles, we have compiled a document containing useful iPad information. This table can also assist you in determining which of the interface profiles provided below will fit your iPad.
This one mounts directly to all generations of the iPad Pro 11-inch.
It slips over the long edge and is secured by magnets built into the iPad.
- Drawing of the mount (pdf)
- STL file – Stereo Lithograpy CAD file
- STEP file – Industry standard CAD format
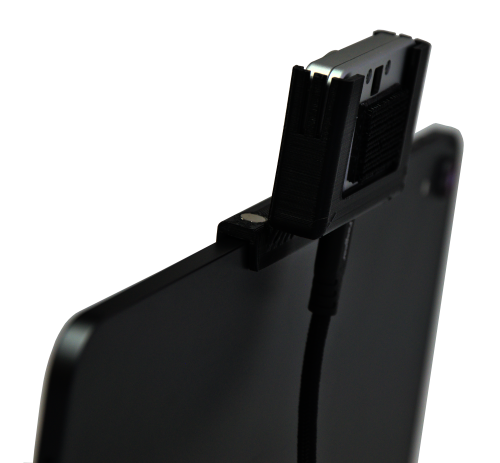
Below is an iPad in a Unicorn Beetle Supcase with a clip-on 3D printed mount
The Unicorn Beetle case by Supcase maintains uniform outter dimensions across most iPad devices and therefore this mount can be used on most iPads. It fits Unicorn Beetle cases for iPad 5, 6, 7, 8 and the second generation iPad Pro 11- and 12.9-inch.
This mount is fashioned from two 3D printed pieces attached with fasteners and adhesive. Printing in two pieces allows the HeadMouse Snap Tray to be separated from the host device interface. Instead of printing one very complicated part you can print two less complicated parts. Depending on your host device, that interface part will likely be a straight print part and will not require supports.
Please refer to these 3D model files and documents for more information.
- HMN/Supcase mount drawing An assembly drawing of both pieces of the HMN SnapTray and the Unicorn Beetle by Supcase profile.
- HMN SnapTray – STL file, industry standard CAD format
- HMN SnapTray – STEP file, industry standard CAD format
- HMN SnapTray drawing (pdf)
- Supcase Profile – STL file, industry standard CAD format
- Supcase profile STEP file, industry standard CAD format
- Supcase Profile drawing (pdf)
- HMN 3D-Print Mount A description of the process we used (pdf)
This video shows how to attach the HeadMouse Nano mount to the Unicorn Beetle case. It is a tight fit.
The mount pictured below is designed for the iPad without a case
- HMN/iPad Mount drawing. Fits iPads 5,6,7 and 8
- HMN/iPad Mount.stl (Stereo Lithography CAD file format)
- HMN/iPad Mount.stp (STEP, CAD file format)
- A description of the process we used.
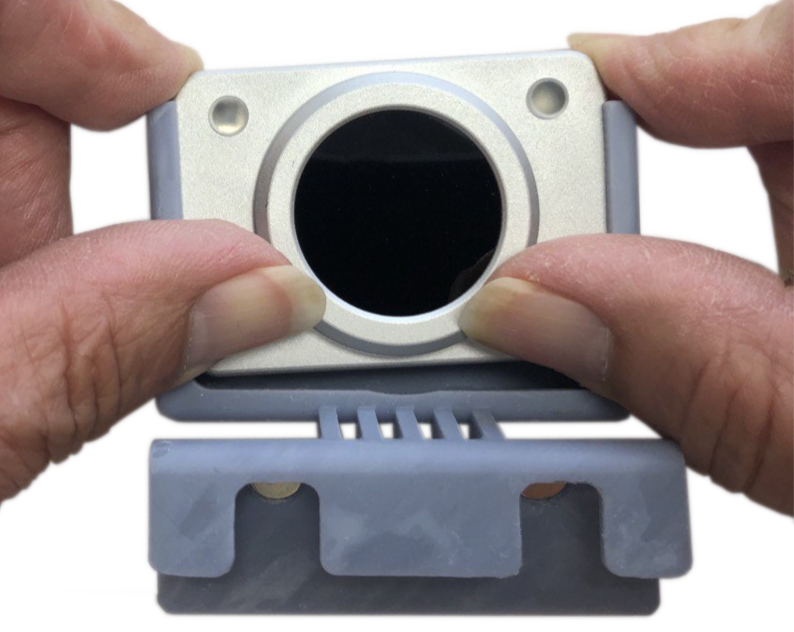
The HeadMouse Nano slides into the mount and is held by two clips. To remove the HeadMouse pull back the two clips with your fingers and push up on the bottom of the sensor bump with your thumbs. Do not touch the dark sensor window.
The mount is held in place by two magnets that align with magnets in the iPad.
Speech Generating Devices
Even though one of the universal brackets can be used, custom brackets are available for selected Speech Generating Devices (SGD). These brackets are designed to match the contours and dimensions of each device. If your device is not mentioned below please call for more information.
Tobii DynaVox
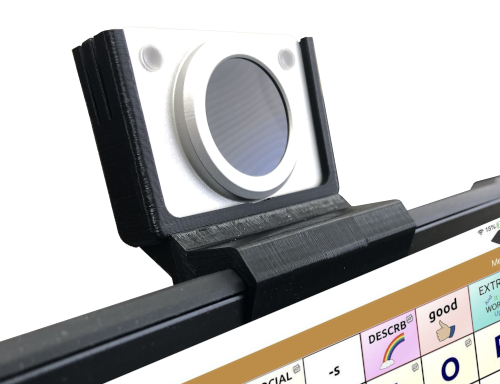
We have designed a 3D-printed bracket for the Tobii i13 and i16 devices. They slide over the top bezel as show in the photograph. It securely engages the lip on the front bezel and the rear contour of the case. Engage the front lip first and rotate it toward the back and down &endash; it is snug.
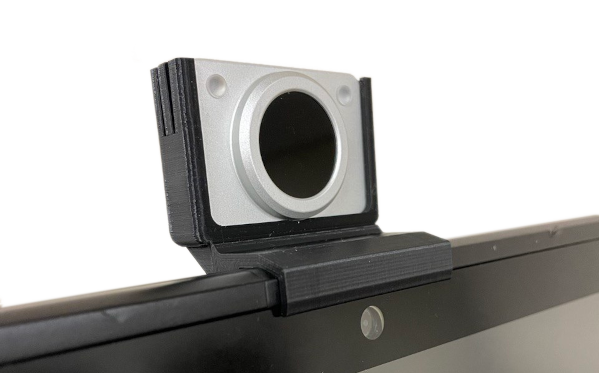
The bracket consists of two pieces, the SnapTray and an i13 or the i16 profile. They are printed separately and fastened/glued to make a complete mount. The i13 and i16 profile files are in the list below.
- i13 profile drawing (pdf)
- Tobii_i13_v2.stl (Stereo Lithography CAD file format)
- i16 profile drawing (pdf)
- i16 Profile.stl (Stereo Lithography CAD file format)
- HMN SnapTray drawing (pdf)
- HMN SnapTray (Stereo Lithography CAD file format)
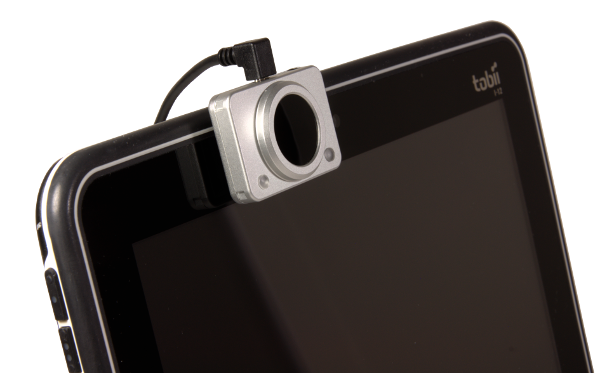
For the Tobii i12 and i15 the HeadMouse Nano is small enough to just attach directly to the bezel, as shown above.
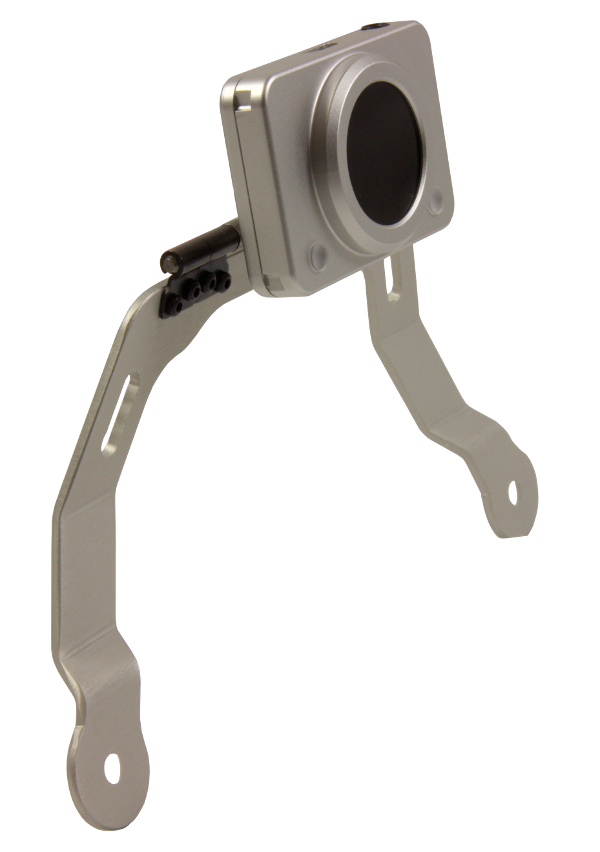
This same bracket attaches to both the T10 or T15 using two screws on the rear mount plate. HeadMouse Nano then looks over the back of the T10/T15. It has a stiff hinge to adjust and maintain the perfect HeadMouse angle. HeadMouse is easily removed from the mount for storage and for use on a computer or another device.
Flat Panel Display
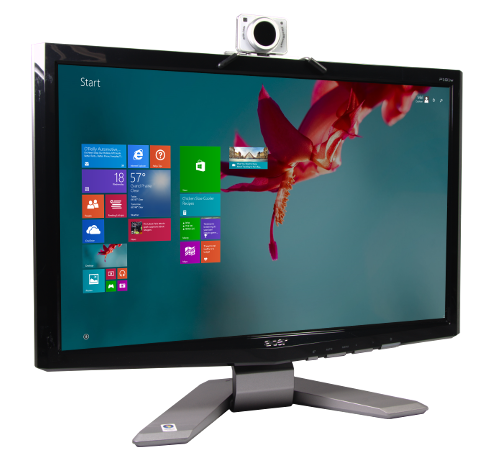
Displays with thin bezels use the universal bracket with extended legs. For displays with wider bezels Dual Lock can be affixed directly to the bezel.

Origin Instruments Corporation
854 Greenview Drive
Grand Prairie, Texas, 75050 USA
Email: [email protected]
Voice: 972-606-8740
FAX: 972-606-8741
HeadMouse is a registered trademark of Origin Instruments Corporation. Tapio, Swifty, Beam, Orby, Breeze, SofType, Dragger, and AirVoter are trademarks of Origin Instruments Corporation. All other trademarks are the property of their respective owners.


